At NovoPsych, we understand the needs of your practice can change and evolve over time. Whether you’re looking for more assessments or additional sessions to record on NovoNote, you’ll be able to update your plan directly from your account seamlessly.
In this article, we’ll guide you through the process of upgrading or adjusting your subscription so you can continue delivering high-quality care with confidence. Our goal is to ensure your plan always supports the way you work, grow and care for your clients.
Here’s a breakdown of the subscription plans you can choose from as an individual practitioner or a multi-practitioner practice:
For more on our available plans and pricing, you may visit our page here.
To change your current subscription, you can update it directly from your NovoPsych account by following the steps below:
1. Select your Account and the “Plan and Billing” section:

2. Scroll down to the individual plan options – from here, you would be able to toggle for monthly/annual pricing and plan adjustments. Simply select “Choose Plan” on your desired subscription.

3. Once selected, check through the payment amount, and your details such as name and email for billing purposes. Confirm this by clicking “Next”:

4. Here you may input your card information if needed and select “Next” to complete the plan upgrade or adjustment:

If you upgrade from one paid tier to a higher paid tier part-way through the month (for example, Pro to Pro Plus), your Pro Action limit increases immediately to the new tier’s monthly allowance, but any Pro Actions you have already used this month still count towards it, so the allowance is not reset to zero (for example, a Pro user who has used 30 of their 50 Pro Actions and upgrades to Pro Plus will then have a 100-action limit for the rest of the month, with those 30 still counted, leaving 70 remaining). A pro-rated charge covering the remainder of your current billing period follows, and your next renewal will be at the new tier’s standard rate.
If you are moving from a free or trial account onto a paid plan, you begin fresh on the new plan’s full monthly Pro Action allowance.
In all cases, your allowance resets on the 1st of each following month.
If you downgrade, your Pro Action limit will follow your new subscription tier (eg. A Pro Plus user downgrading to Pro, will have 50 Pro actions for the remainder of the calendar month from 100 Pro actions). Your allowance does not refresh at the point of downgrading; the new tier limit applies and will next reset on the 1st of the upcoming month.
If you are on a paid subscription, you will be able to set this up by adding or linking users from your account. Here are the steps to do this:
1. From your account settings, select the Users section and click on “Add User”:

2. On the next pop-up, add the user’s email, role type and tier – once these are selected, simply click the arrow next to “Invite” at the bottom:

This will then send an invitation email to the user and after accepting, they will be linked to your Practice plan.
Thereafter, the subscription cost will automatically update according to the tiers selected. You will also find our guide here for how you can manage the users, add new users or remove existing ones as well as view their usage at any time.
If you need any support or assistance with the above process, kindly reach out to our support team at [email protected]
You can cancel your subscription at any time through your account settings. To avoid further charges, we would recommend cancelling the subscription before your next renewal date.
Kindly note the following upon cancellation:
We recommend reviewing this information before cancelling to ensure it aligns with your needs.
Here is our guide for how you can cancel the subscription from your end:
1. Select your Account and the “Plan and Billing” section:
2. Scroll down and select “Manage Account”:

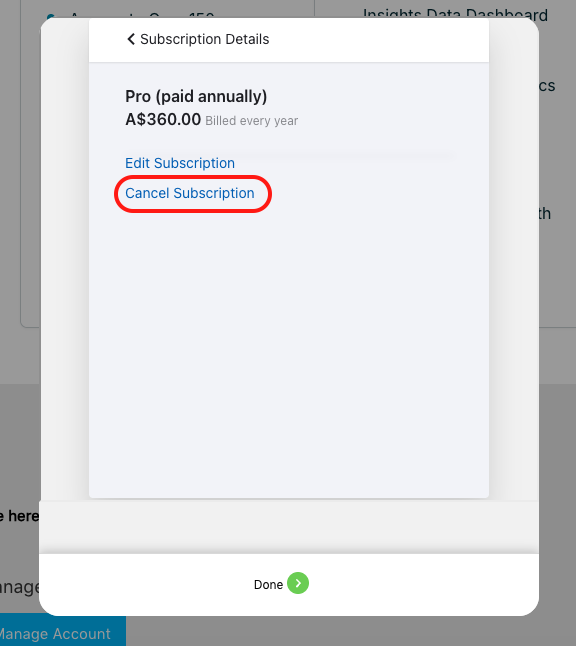
3. Select your current plan and in the next pop-up, select Cancel subscription:

4. You’ll be able to see the cancellation take effect on your next immediate renewal date for both monthly or annual subscriptions.
To proceed, a cancellation reason must be selected from the dropdown (optional: if you’d like to provide more feedback, you can also do so in the space provided below). From there, select Confirm Cancellation.
On the next pop-up, select Confirm:


5. Your subscription is now scheduled for automatic cancellation on your next renewal date. To undo this or continue your subscription upon your renewal, simply select Remove Scheduled Cancellation:

